If you didn’t have the time to decorate your home for Diwali amidst a zillion other things, here’s our handy Do-It-Yourself guide where arts and craft experts share easy tips to help you get festival-ready
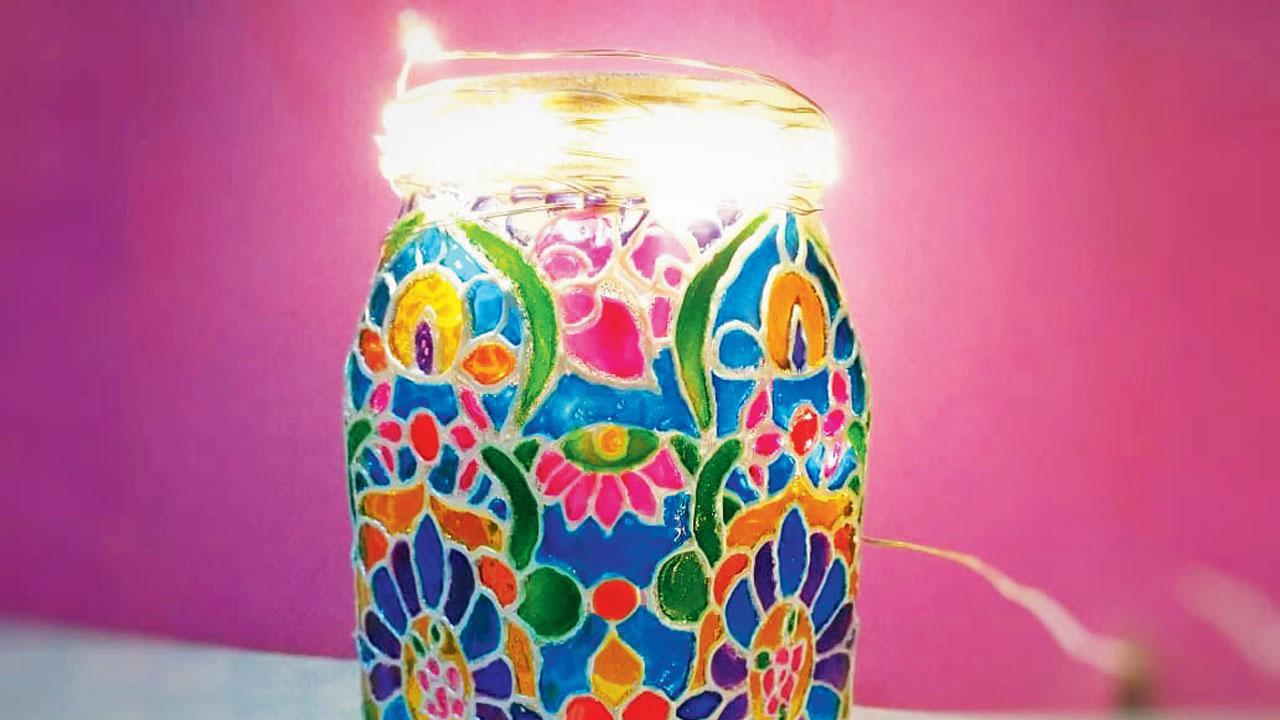
A simple mason jar can make for an innovative Diwali lamp
Mason jar lamp
ADVERTISEMENT
>> Convert any old jar into a DIY lamp with the help of a 3D outliner and glass colours [you can also use acrylic paint].
>> Clean the jar with sanitiser to remove all the glue or stickiness from any labels.
>> Use wax crayons to draw simple freehand drawing of floral or geometric designs and outline the design using a 3D outliner. Let it dry for an hour, and then fill up the spaces within the figures using bright glass colours or acrylic paints. Let it dry out for a few days.
>> Take small-sized LED fairy lights and gently place them inside the jar to light it up.
Upcycle
This festival is a great opportunity to decorate and light up the home in various ways. Look around your home and pick any product or object that has been lying unused to upcycle it. For instance, a mason jar, which can be used to create a cool lamp.
Floral rangoli
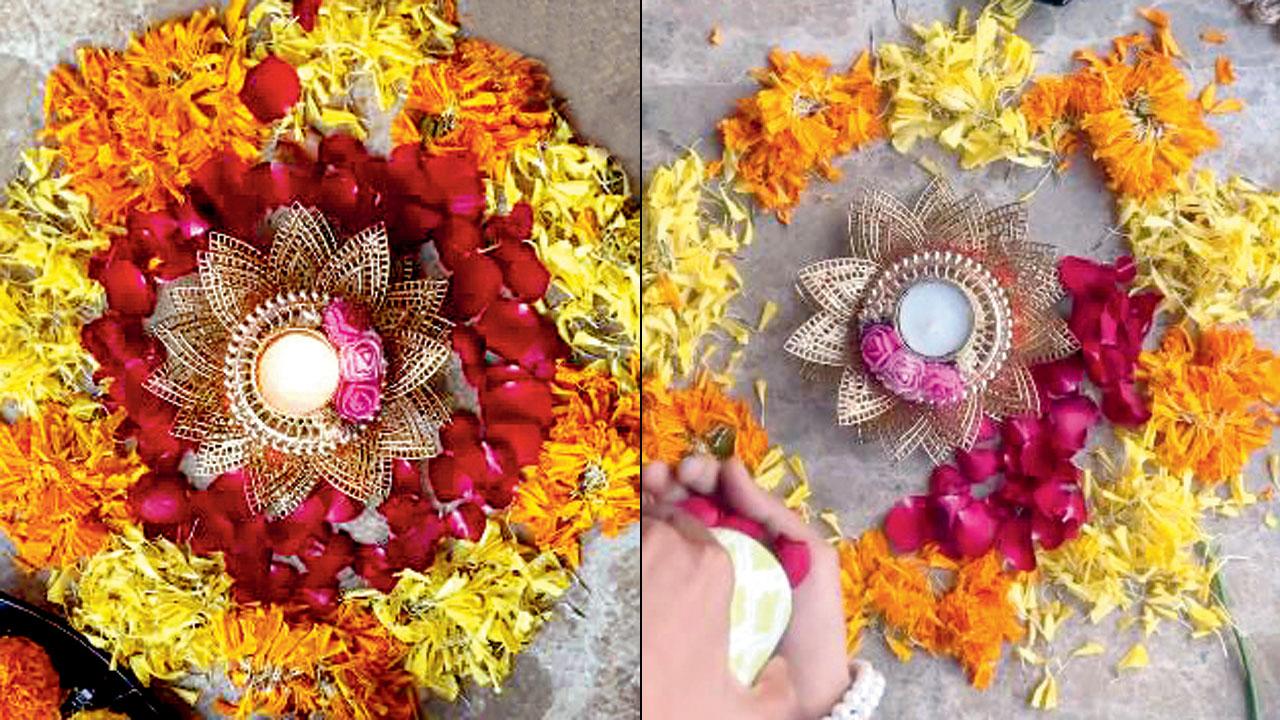
>> You don’t have to be an artist to create giant colourful rangolis that are so essential in the Diwali décor. Step away from the traditional rangoli and try these simple floral designs.
>> Buy a readymade metallic embellished diya that covers at least seven to eight inches of space. On the floor or on a centre table, place the diya. Next, around the diya, leave some space, and place petals of yellow and orange marigold flowers alternately.
>> Now, in the space between the diya and these petals, place the petals of the red roses. Keep a tea light candle in the diya and the colourful rangoli is ready.
Beyond traditional
The Diwali festival also brings traditions and customs where the one common factor on all auspicious days is the puja, aarti and lighting of the diyas. Diyas, the most basic element of this festival, can be created in a very interesting way. Also, this can be used as an aarti thali for the special Diwali puja.
Paper marigold toran
>> Take green and ochre yellow crepe papers to make marigold flowers and Ashoka leaves. Cut the yellow paper into a circle of 1.5 inches radius. Cut around six such circles for one flower. Stack all the paper circles on each other, pinch at the centre and fold the edges to give them the shape of the flowers.
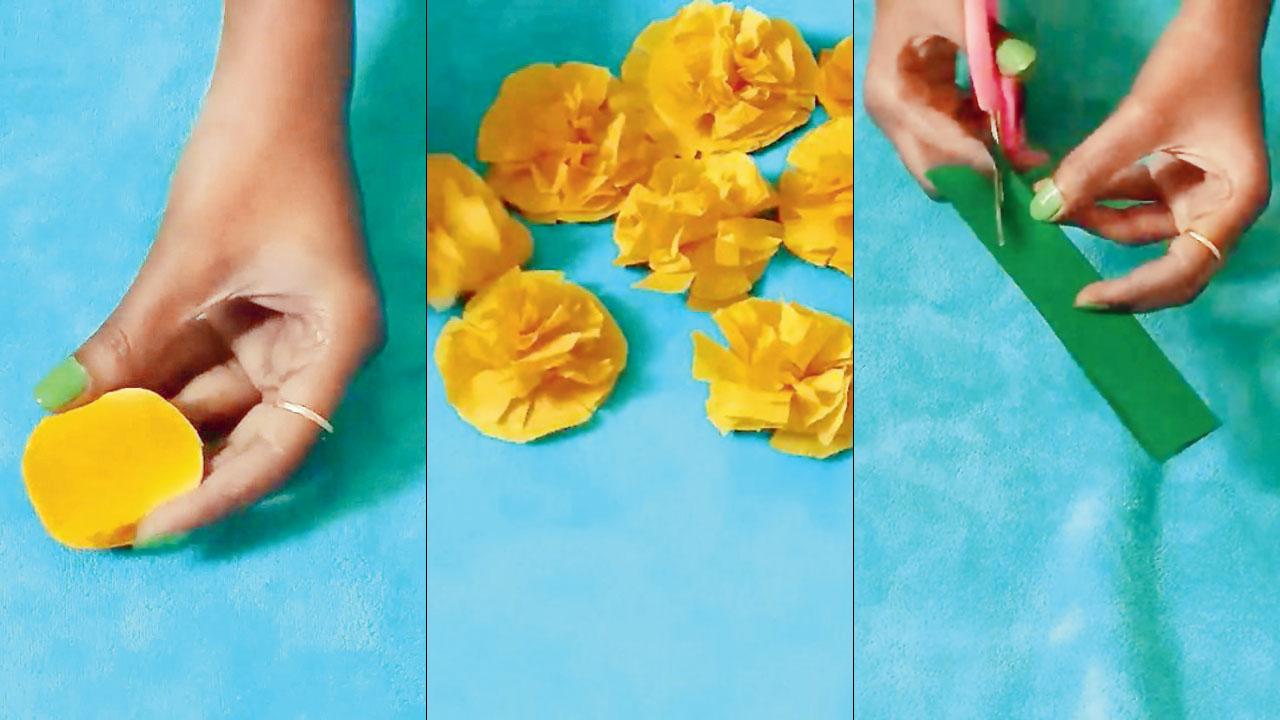
Cut the yellow paper into circles (left) Pinch at the centre and fold edges (right) Cut zig zag to make the leaves
>> Now, for the leaf, take green paper of around six inches (pic 3) and fold it vertically. Cut them in a zig zag shape on the edges to give it a similar look to the Ashoka leaves. Create around eight of these leaves.
>> Take a sparkly or dazzling piece or lace [sturdy cotton threads are also suitable] and stick the flowers and leaves on it, at a distance of two inches between them. And voilà! The toran is ready. Stick the toran to the entrance of your home’s main door.
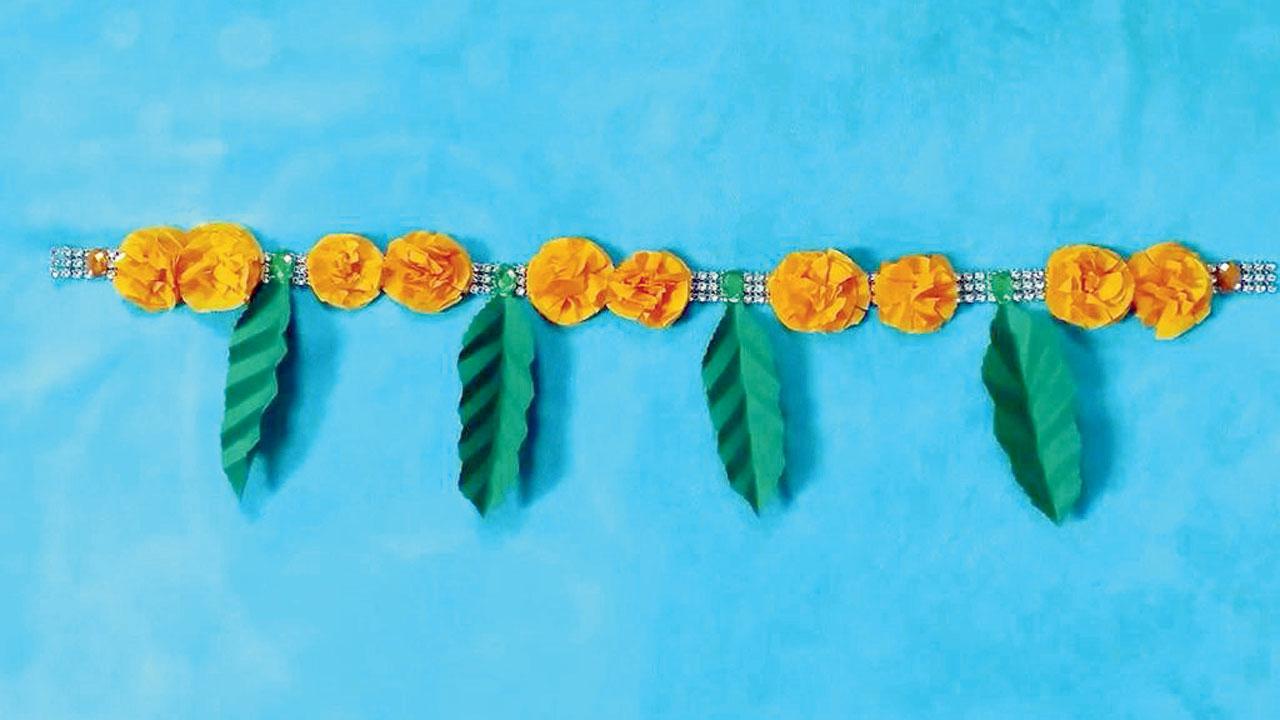
Stick the flowers and leaves on the thread at a distance of two inches
>> Since it’s made from paper, it can be reused.

Shraddha Kirvale, Crafty Shrads, @crafty_shrads
Diya and thali fusion
>> On a mid-sized golden-coloured cake board, place a readymade golden metallic tea light holder with some embellishments on it. Using glue, stick it at the centre of the board. Now, at every half-inch distance, around the diya, apply glue, to stick the multi-coloured pom pom woollen balls that are used for making torans (pic 1).
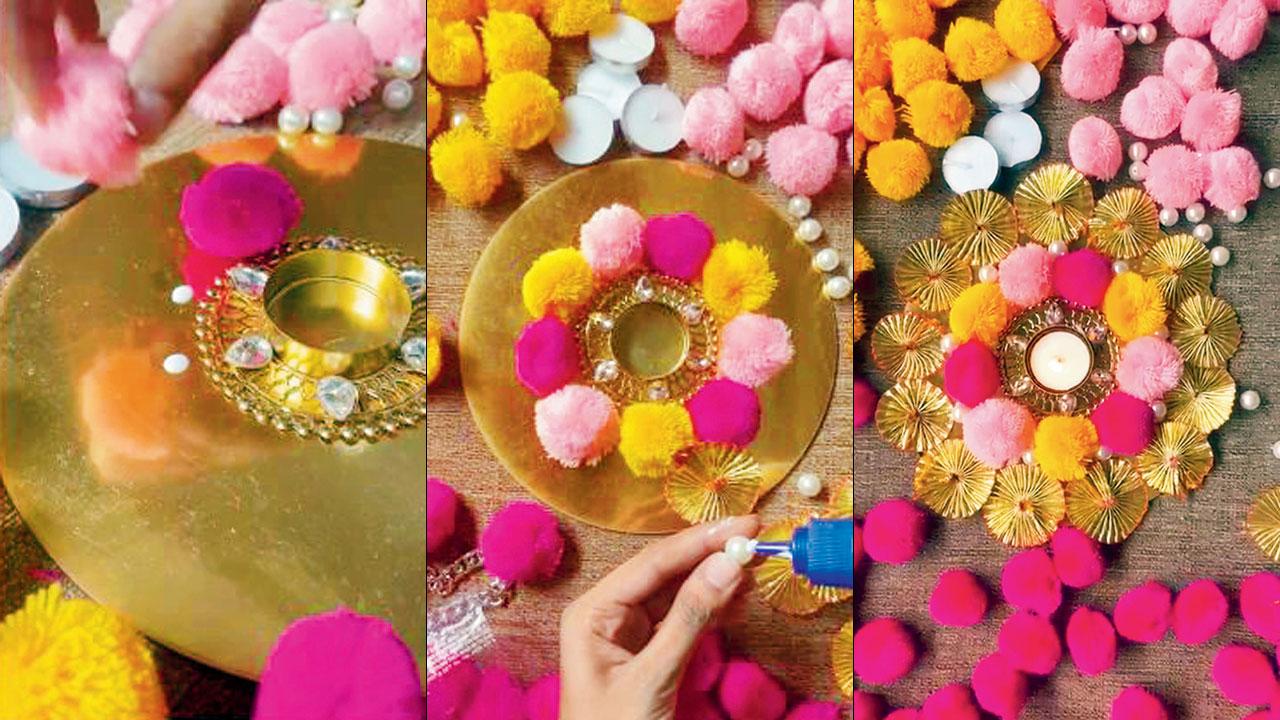
Around the diya stick multi-coloured pom pom woollen balls (left) Use glue to place artificial pearls next to the golden decorative pieces (right) It can be used as an aarti thali and also as a diya decorative. Pics Courtesy/Instagram
>> Using the glue, on the outer circle of the glued woollen balls, place glue every half inch and stick golden-coloured decorative (pic 2), and place them on the edges.
>> Using the glue once more, place artificial pearls next to these golden decorations. This is a lightweight thali, so it’s easy to use. You can place it in the gallery or the window and add a tea light candle at the centre.

Mahek Jain, Justlittlethingsss, @justlittlethingsss
Pen mandala
>> On a paper, make concentric circles using a compass or a stencil. Divide the circle symmetrically with many lines, like a pizza. Start from the centre, making basic shapes and keep repeating them. It’s okay if they don’t look the same, as long as they are similar.
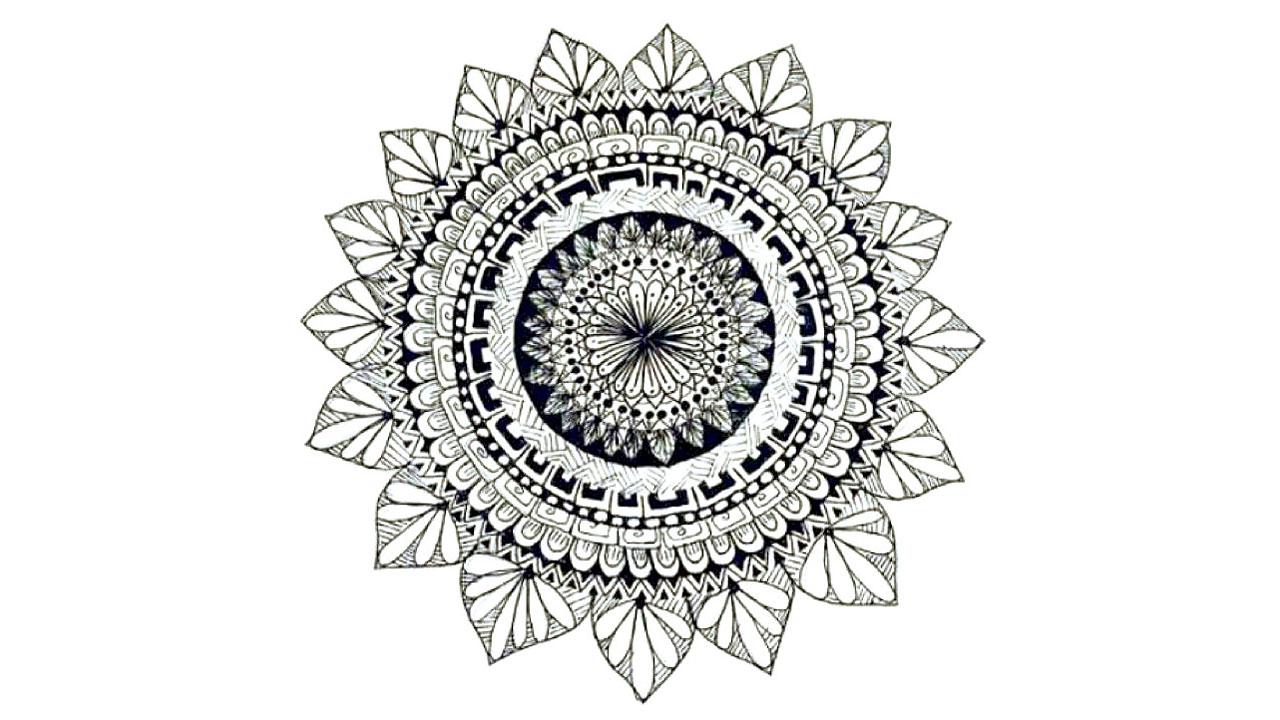
>> Outline it with a pen. You can ink some patterns as they will create an amazing mandala of your own. Once done, place the paper on the table and place a tea light candle on it.
Watercolour mandala
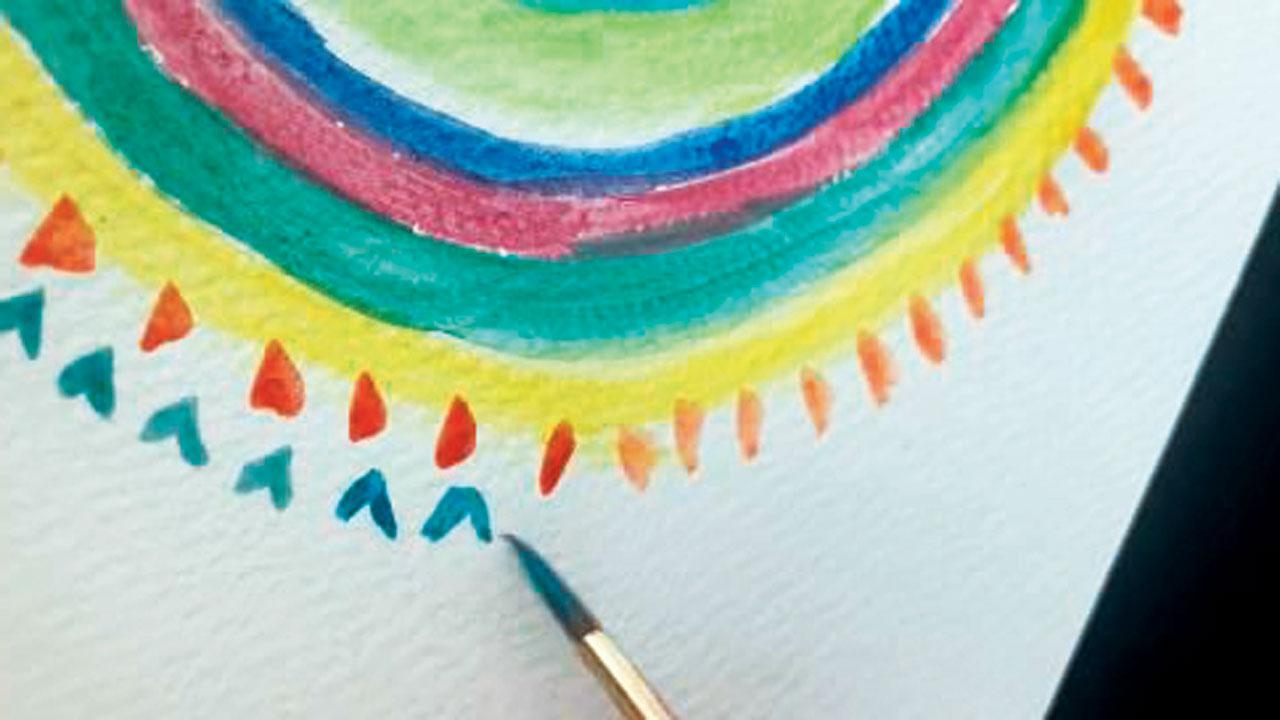
Fill each circle with basic patterns and use bright colours
>> On a mid-sized canvas, make a circle in the centre directly with a paintbrush. Keep making circles around the central curls using different colours.
>> Once you have painted the circles, use another colour to make a very basic pattern.
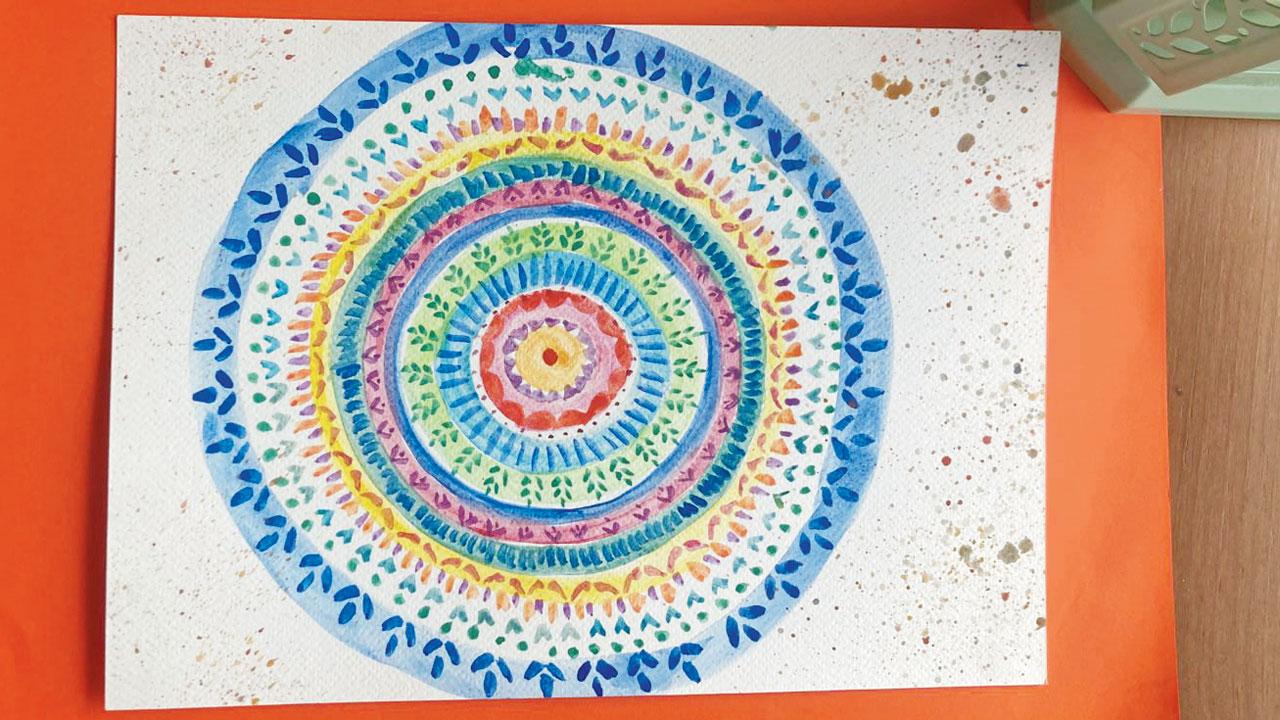
>> Keep filling each circle with basic patterns and your mandala is completed.
>> The brighter the colours, the happier your mandala looks for the festive season.
>> Place it on a table and light diyas around it, or flat on the table and place a diya or a tea light candle at the centre of the mandala.

Rakhi Chokhani-Shah, Art & Soul Studio, @rakhushka
The art effect
Here’s an interesting way to have a diya that’s neither traditional nor modern metallic. It’s an artsy twist that requires paper, pen and watercolours. All you have to do is create easy mandala designs on paper, on which you can place a diya or a tea light candle. This can be a fun activity especially for children.
 Subscribe today by clicking the link and stay updated with the latest news!" Click here!


